
Often the most mundane daily tasks are the ones that make the biggest difference in our lives. Meal prepping clean dishes, folding loads of laundry, and paying monthly bills are all thankless tasks that undoubtedly help our lives run smoothly in the long run. Similarly, with beauty, cleaning our brushes is a non-glamorous task, yet it makes the world of a difference when it comes to achieving and maintaining healthy-looking skin.
What if we told you that your makeup brushes may be the sole reason behind frequent and pesky breakouts, uneven texture, or wasting precious product? That’s right — while those densely packed bristles that work together to slay the perfect look can become a breeding ground for bacteria if they are not properly and frequently cleaned. In other words, there’s no award-winning cleanser or detox mask that can prevent skin concerns if they are followed by tools that harbor dirt, grime, and bacteria.
From spot cleaning to drying methods, we’re sharing the must-know hacks to effectively clean your makeup applicators, while preserving their longevity. After all, your products can only perform as well as your applicator allows.
The LYS Difference
When we think about the most iconic makeup looks (e.g., Beyoncé’s 2020 BET Awards beat by Rokael Lizama), we can expect that brushes played an integral role in achieving optimal coverage and a seamless blend. These extensions of your makeup collection help maximize product usage and allow for full customization of your face and eye looks. But, as any makeup artist will share, not all brushes are created equal. That’s why LYS Beauty decided to launch cruelty free synthetic brushes to meet the needs of makeup junkies who want to score big on responsibly made applicators that rank high in performance and quality.
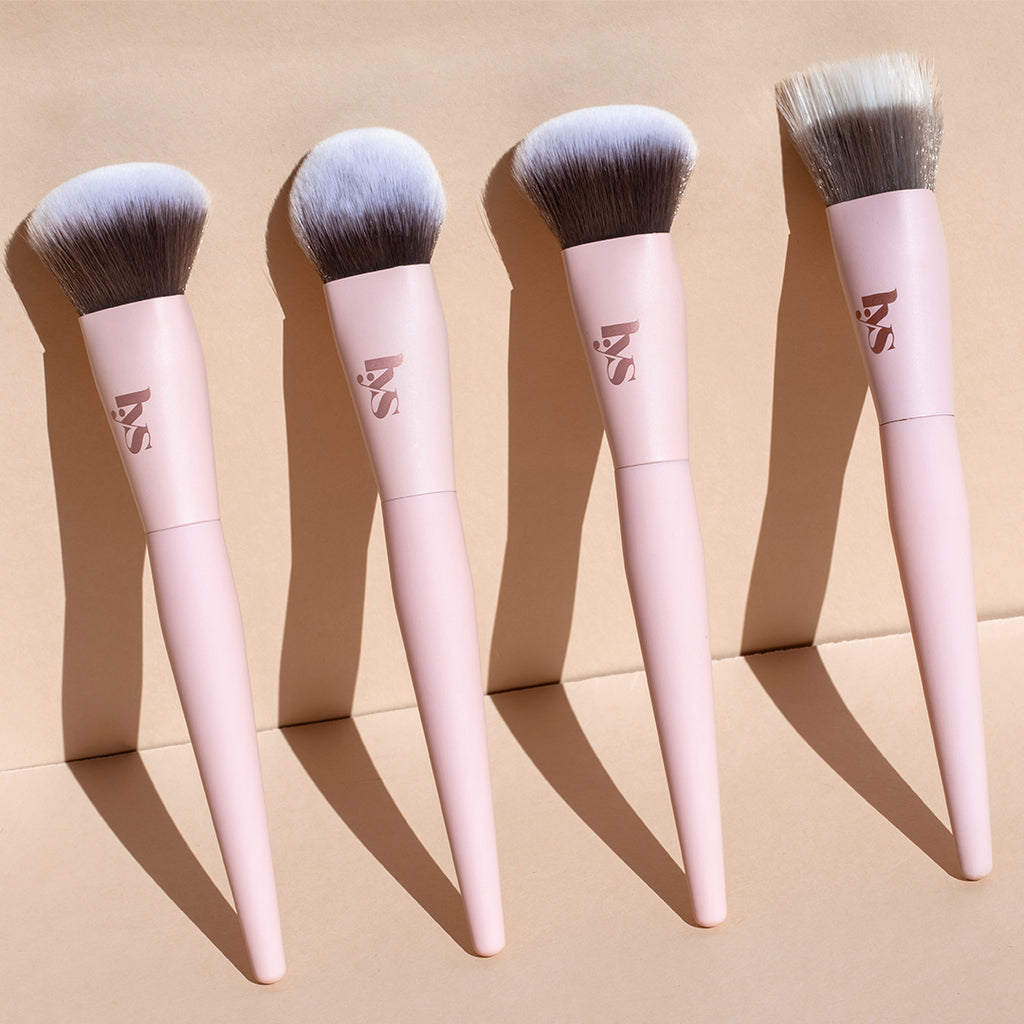
Luckily, we compiled a comprehensive introductory guide to our brushes for your reference. Here’s the long and short of it—
- Foundation Brush: A densely packed synthetic applicator designed to seamlessly blend cream and liquid formulas.
- Powder Brush: A fluffy hypoallergenic brush that easily distributes and buffs powder foundation or setting powder onto the face for an airbrushed finish.
- Sculpting/Bronzing Brush: A compact and tapered brush that allows for concentrated application and blending of contour and bronzer products.
- Stippling/Blush Brush: An easy-to-use stippling brush that quickly blends cream and liquid formulas with customizable coverage.
- Highlight Brush: An ultra-soft cruelty-free domed brush designed to easily diffuse liquid, cream, and powder highlighter onto the face with a buildable finish.
At only $15 each, these essential complexion brushes are made with ultra-soft anti-bacterial synthetic hair, making them a no-brainer for those with sensitive, or visibly reactive skin. Complete with rubber-finished handles and recycled aluminum ferrules, these high-quality brushes are created to stand the test of time.
Timing
Investing in the right brushes is the first step. Now, it’s time to learn how to care for them. If you research how often brushes should be cleaned, you’ll find responses that report anywhere from daily to a monthly basis. However, skincare professionals unanimously agreed that the more frequent, the better. Depending on your personal makeup usage, brushes should be spot cleaned following each use, with deep cleansing occurring on a weekly, or bi-weekly basis. This 10-minute task helps prevent product and bacterial build up, and ensures you only use the necessary amount of product each time.
The 5-Step Cleaning Process
- Step 1: Wet the hypoallergenic synthetic bristles with lukewarm water to loosen any existing product or grime.
- Step 2: Apply a drop of gentle cleanser with degreasing properties to the palm of your hand (or cleansing mat).
-
Step 3: Begin cleaning using a circular swirling motion in the palm of the hand. Rinse and repeat until there is no more product remaining.
- Pro Tip: Keep brushes bristles down to avoid water entering the ferrule.
- Step 4: Remove excess water from the bristles and realign into their original shape.
-
Step 5: Place brushes flat angled down and allow bristles to fully air dry before using.
- Pro Tip: Keep brushes bristles down to avoid water entering the ferrule.